User guide
User
In order to use Doatask, one needs a user. Either one registers directly in the system and can then log in in the future, or the login is done via an LTI platform such as Moodle, which then forwards the user into Doatask.
There are three types (roles) of users:
- student
- teacher
- admin
When logging in through an LTI platform like Moodle, the role (student or teacher) is taken from the platform. If you register directly in Doatask, you have the student role by default.
Only an admin user can change the role of a user.
Domains
New domains are created by an admin user or created on the fly when importing tasks.
Task
All tasks have properties that are always present.
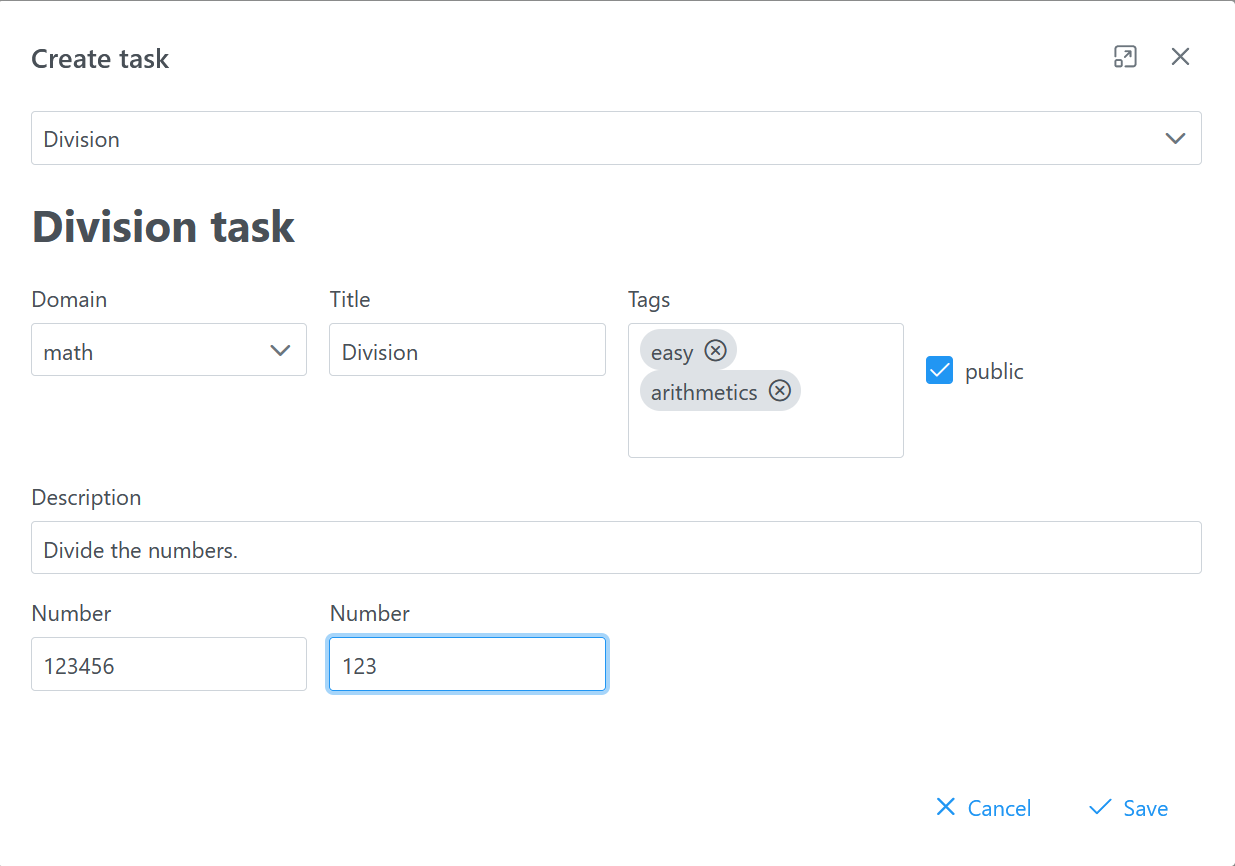
If you create a new task you have first to select the plugin. A plugin offers certain plugin specific task types. Then you fill in the values for the following properties:
| Field name | Value |
|---|---|
| Domain | knowledge domain |
| Title | title of the task |
| Tags | tags that can be used to classify tasks |
| public | if checked the task is visible for all users |
| Description | description of the task |
| plugin specific fields | see the documentation of the plugin |
Then you can save the task.
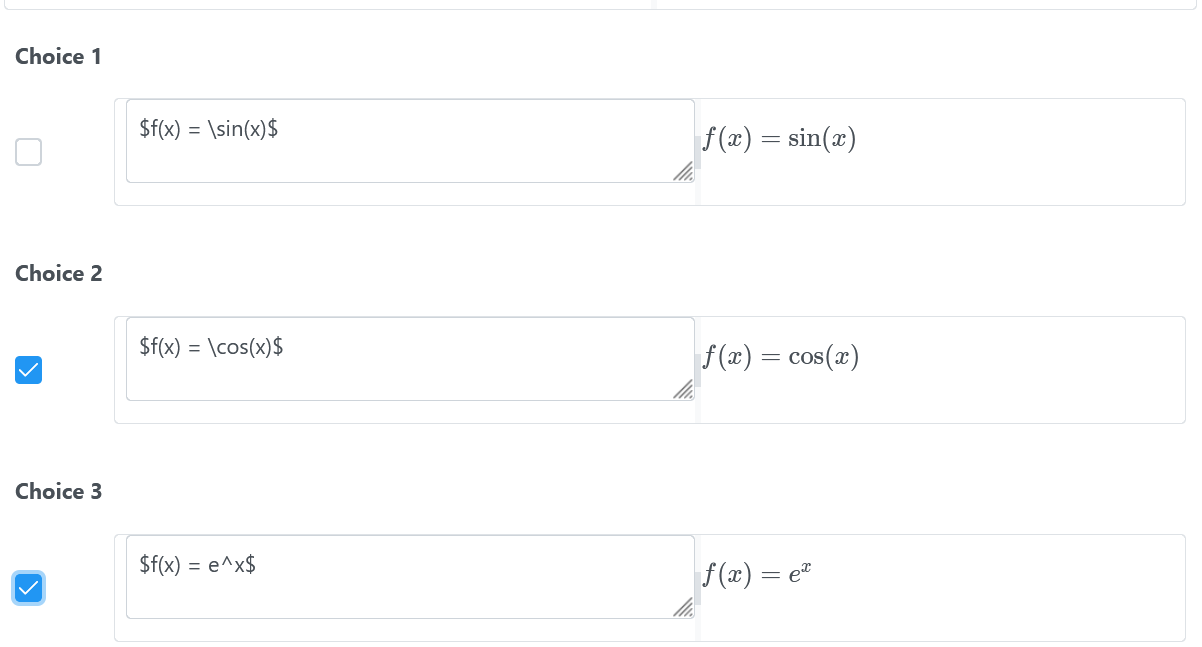
In some plugins (e.g. multiple choice) the text of the description can be markdown-it. You can also use LaTeX via KaTeX.
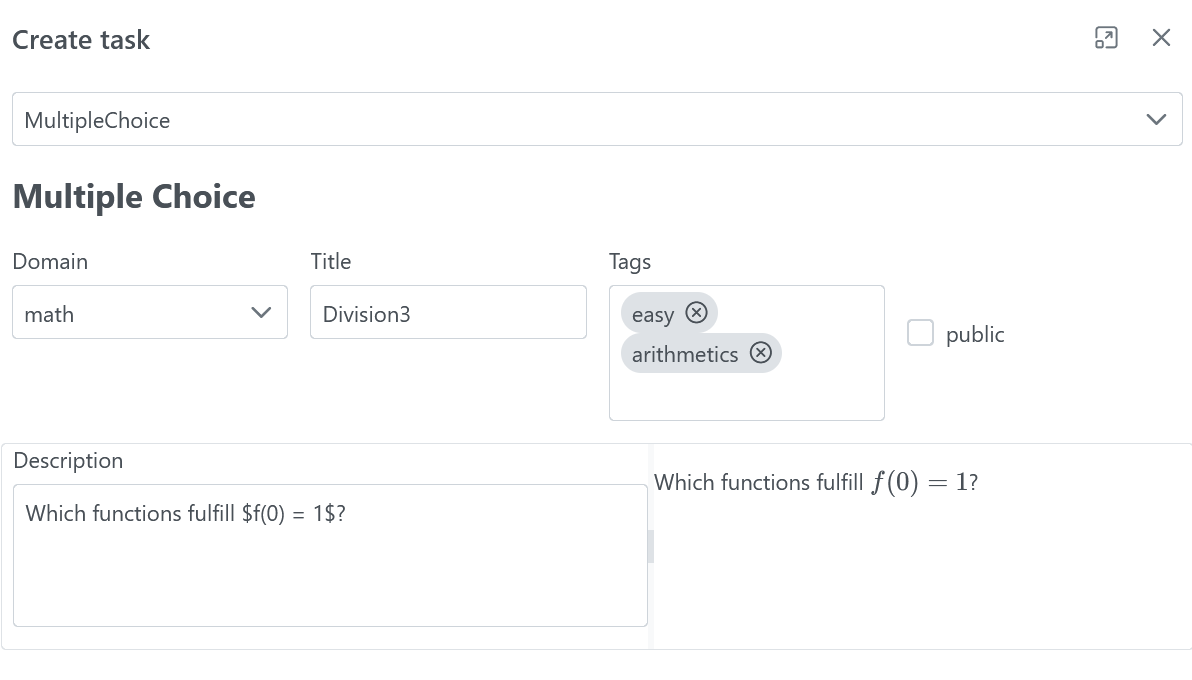
On the left you enter a text in Markdown format with optional LaTeX formulas and on the right you see the rendering of this text.
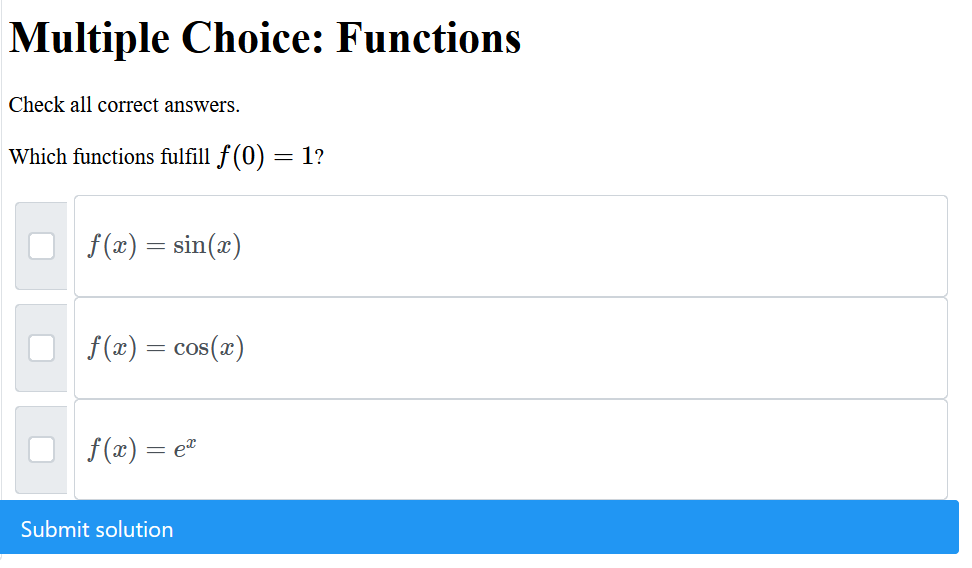
The task is presented to the student as follows:
Assignment
When creating a new assignment, you must first fill in the following fields:
| Field name | Value |
|---|---|
| Title | title of the assignment |
| Description | description of the assignment |
| public | if checked the assignment is visible for all users |
| Due date | the date when the assignment is due |
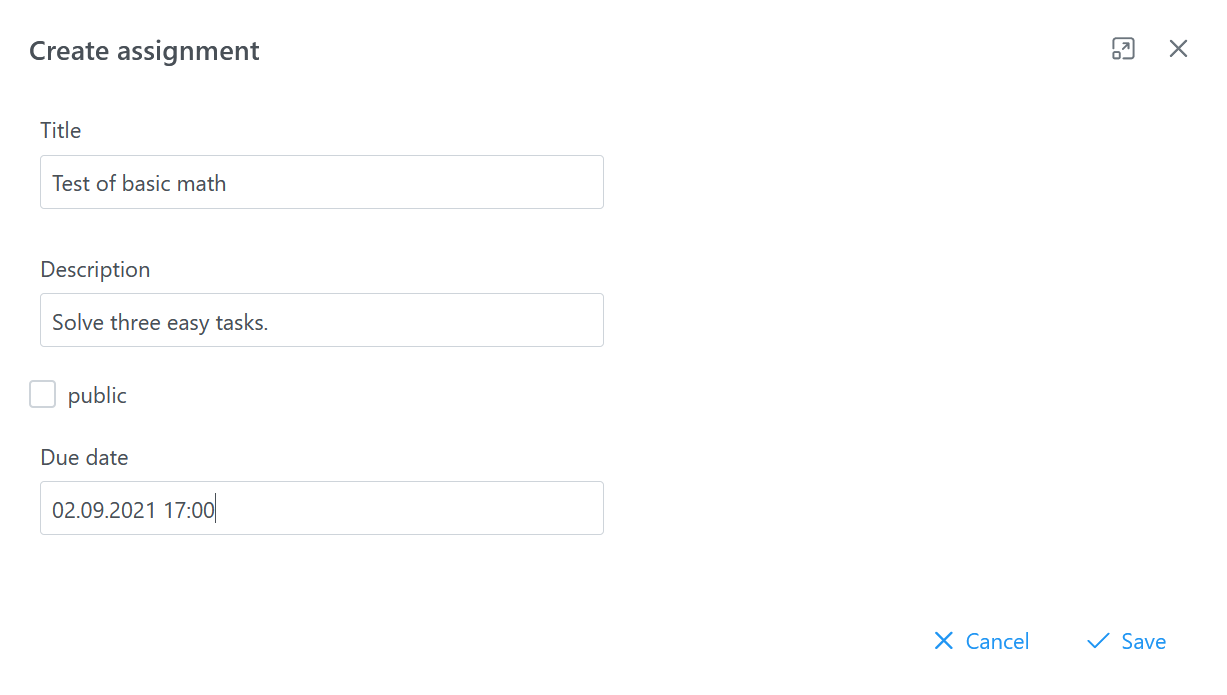
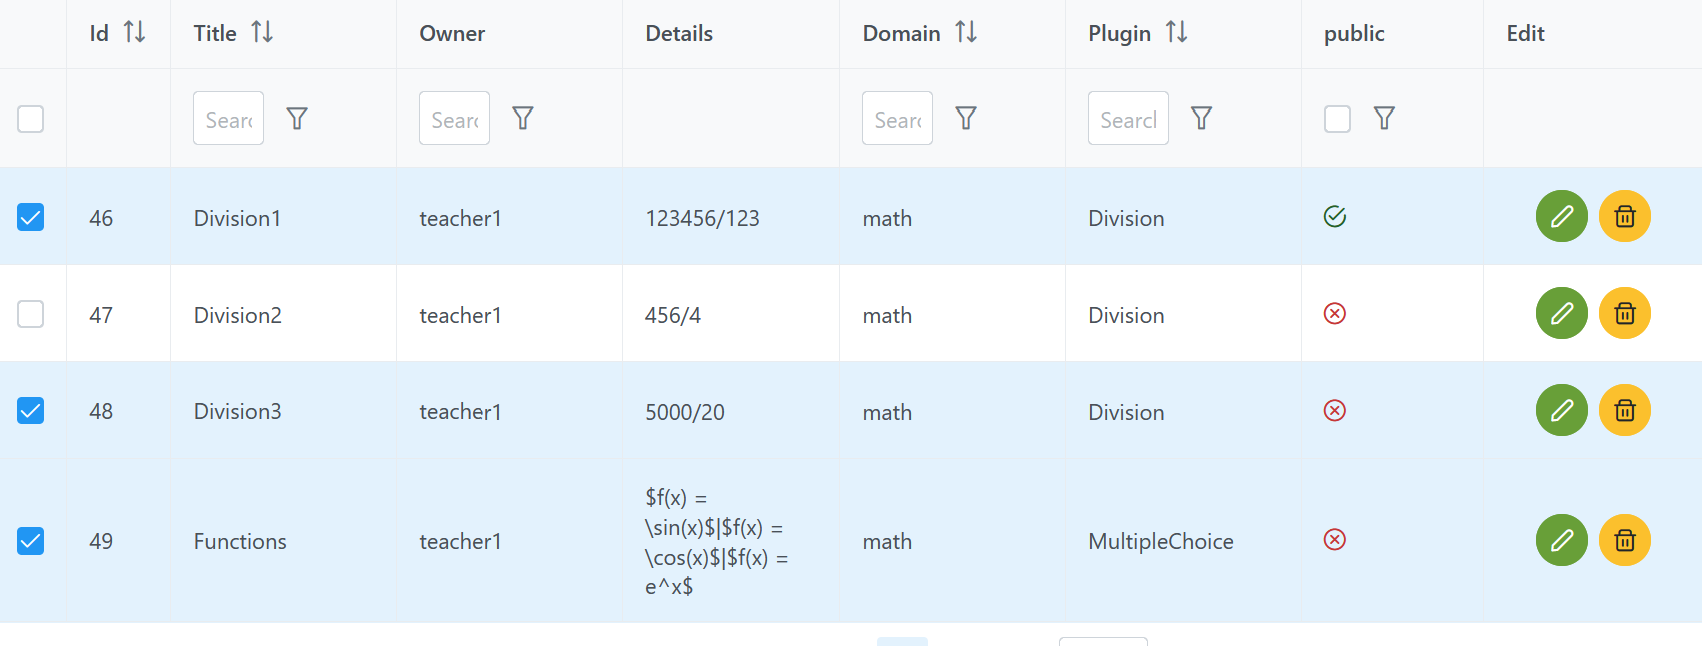
Then you can save the assignment. The assignment is created but does not have any tasks yet. The next step is to add tasks to the assignment. The tasks can be selected from all the tasks that the teacher has created or that are public.
The order of tasks can be changed by dragging a task by its hamburger menu (three horizontal lines) to the desired position.
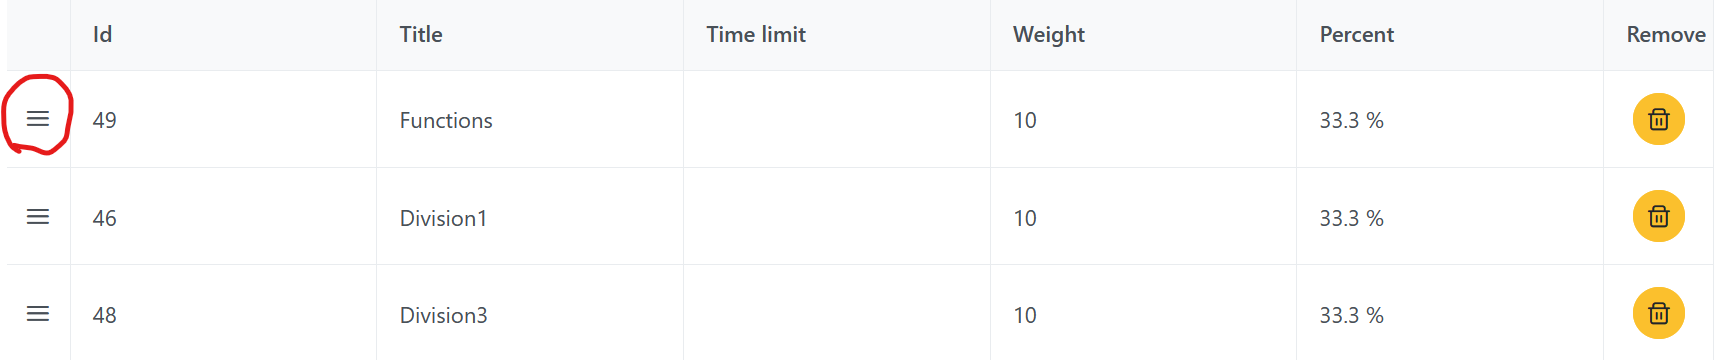
Within an assignment, each task has a weight and an optional time limit.
The default weight is 10. You can change it by clicking on the field and entering a new value.
The optional time limit is specified in seconds. If the student selects a task with a time limit from an assignment, the task is displayed and the time starts to run. It is not possible to switch to another task when the time is running.
To set a time limit, click the field and specify the time in seconds.
The assignment is presented to the student as follows:
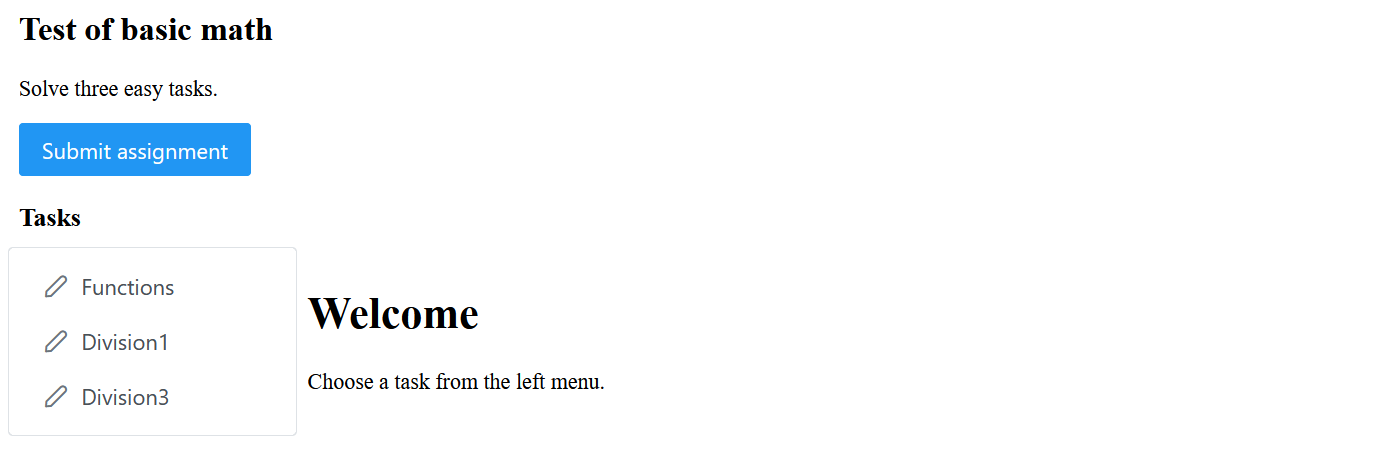
Students can choose the order in which they complete the tasks. They can also switch back and forth between tasks as long as they do not have a time limit.
Practice
Students can practice tasks freely. Here, the tasks that are public are available. The students can determine the level of difficulty (task evaluation) of the tasks themselves.
Ratings
Students can view the evolution of their rating number for any knowledge domain as a curve. They can also see a list of students with the best rating numbers.
Submission
The student, after entering their solution to a task, can submit that solution. The solution is then evaluated. In order to submit an assignment, all tasks for that assignment should have been submitted first. If the student has logged in through an LTI platform such as Moodle, the grade for assignment will be reported to that platform.
Moodle integration
In order to use the tool in Moodle, choose a course and then "Add an activity or resource". Choose "External tool".
You get a form "Adding a new External tool to LTI" like this:
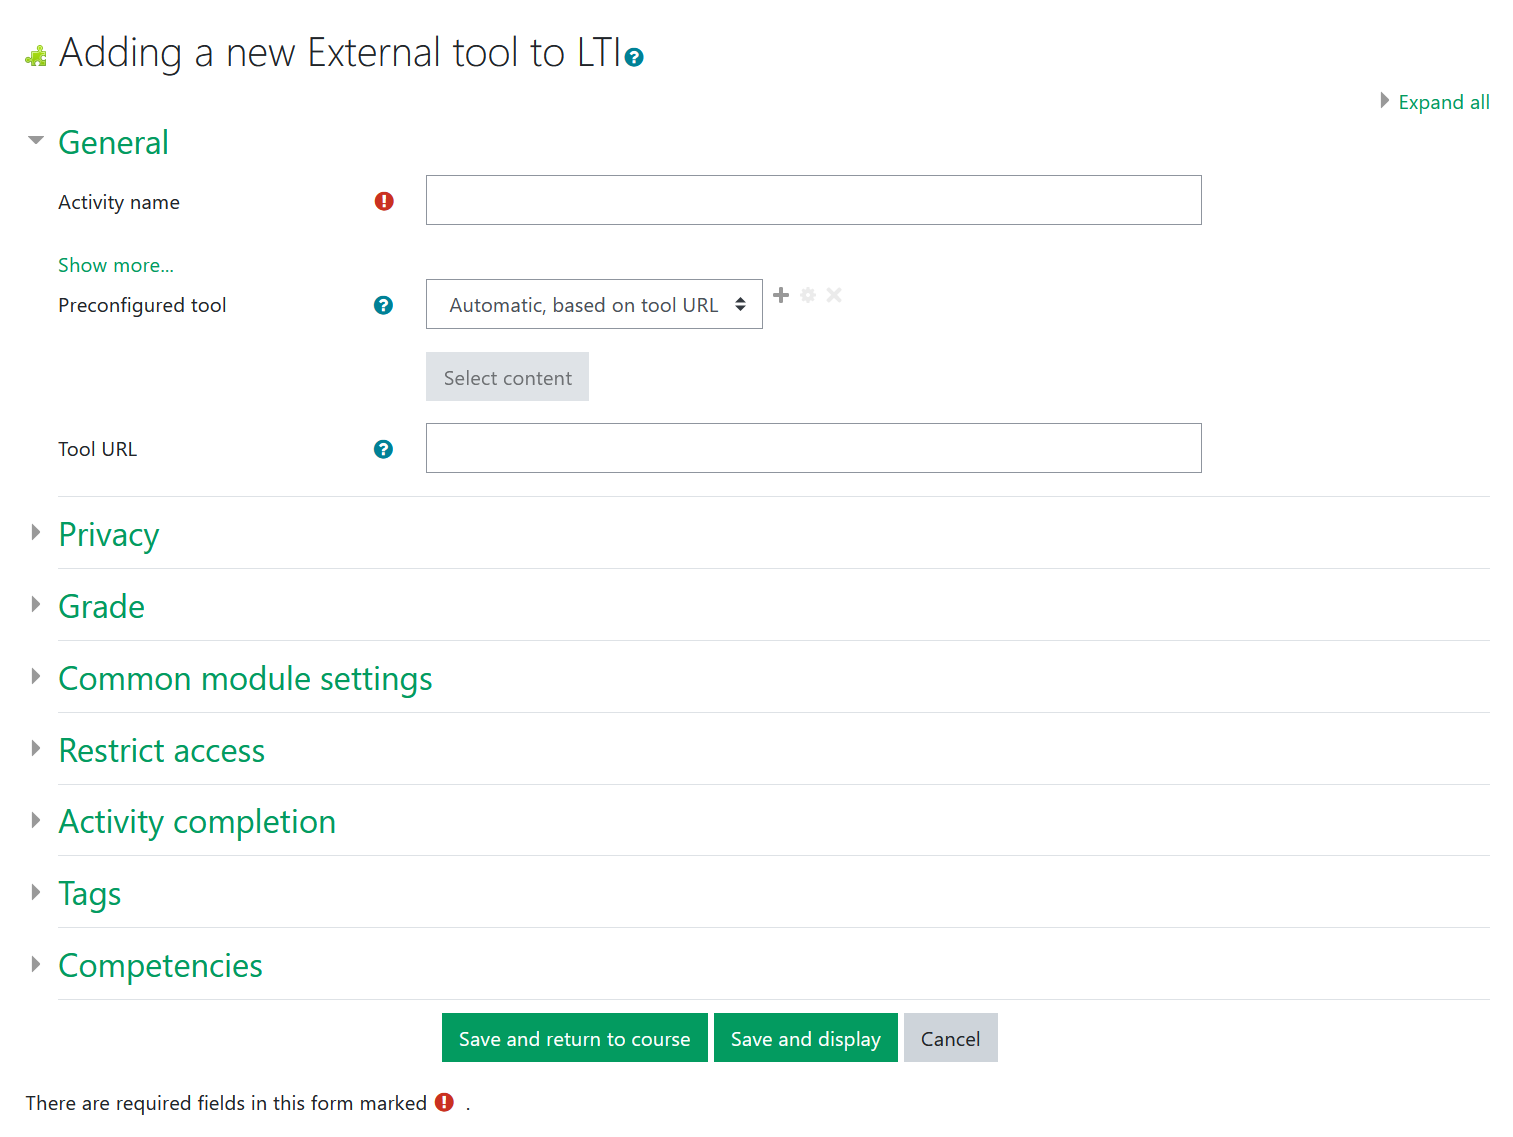
Fill in the field "Activity name" and click on the plus sign behind "Preconfigured tool".
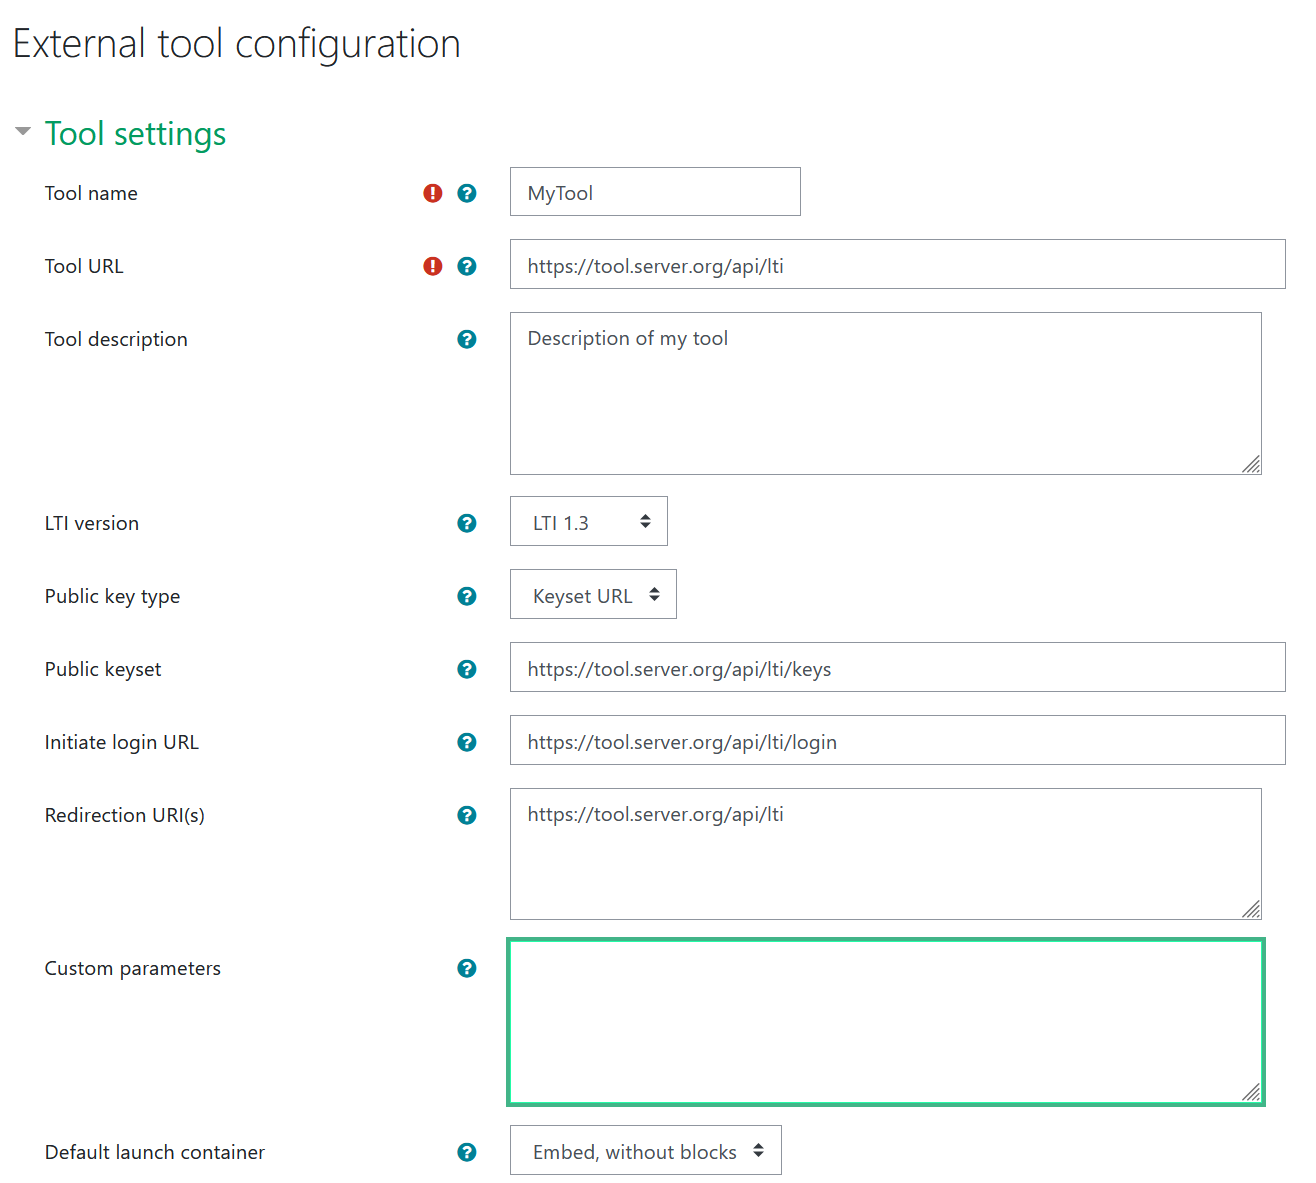
A new form "External tool configuration" opens. First choose the LTI version: LTI 1.3. Fill in the other fields according the following example. Replace "tool.server.org" by the name of your server.
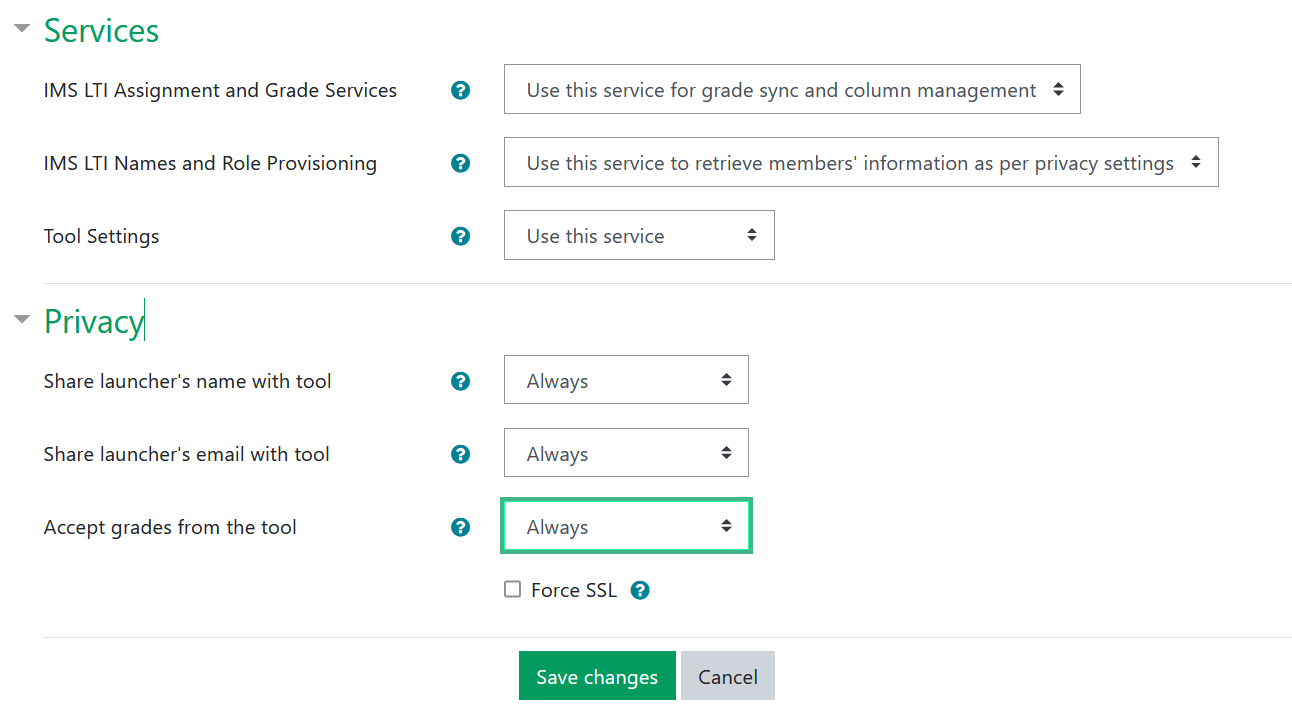
Normally you want to grade the solutions of the students and report the grades from the tool back to Moodle. Then choose the following settings for "Services" and "Privacy".
Finally click on "Save changes". You get back to the form "Adding a new External tool to LTI". Note that in the field "Preconfigured tool" the name of your tool ("MyTool") appears. Click on the gear icon behind the plus sign. The form "External tool configuration" reopens but there is a new read-only field "Client ID" with a content like e.g. "3O2qlBuB52T4kYx". This string identifies the newly created instance of the tool. The client ID must be registered in the tool by an admin.
After saving the activity can be used.
You can add more activities based on this tool. Simply add a new activity by choosing "External tool" and and in the "Preconfigured tool" field select the name that you have previously given to the tool.
If you want the students to get a specific assignment via this activity, click on "Show more..." under "General" when defining the activity and write for example the entry assignmentsolve=5 in the "Custom parameters" field. This will show the assignment with ID 5 to the students.
The grade for this assignment will show up in the grade book under the assignment title.
Instead of assignmentsolve=5, you can also write as=5 for short.